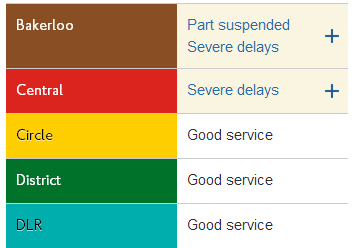
Recently I asked to create a service update display indicator for the London Underground for my office. To do this as cheaply as possible we created it with a Raspberry Pi.
This seems like a simple concept, but it has a number of issues that needed work.
I will only cover the specifics of getting the display working. I will leave setting up the install of Raspian to you.
The URL’s that I have used to get the TfL Line Status information are listed at the bottom of the page, as well as other useful information.
Step 1 – Get X to start automatically at boot
The first step is to get the graphical X windows software to start automatically on boot-up, otherwise we cannot run a web browser.
For this task we need to use the standard Raspberry Pi configuration utility.
sudo raspi-config
Then use your cursor keys to scroll through the menu to find “Boot Behaviour”. You then need to select whether you want to boot either “Desktop (GUI Interface)” or “Command Line”.
We need to select “Desktop (GUI Interface)” to make sure X11 starts at boot-up.
When this is complete you could exit the configuration utility and reboot. However, I would recommend you not too and move to Step 2 first.
Step 2 – Set the correct timezone
Make sure you are still in the Raspberry Pi configuration utility.
Select “Change Timezone”. Then select the correct time-zone from the list of available options. This is to make sure the TfL web page displays the correct update time.
Once this is complete you can exit the Raspberry Pi configuration utility and reboot.
Step 3 – Disable Screen Blanking
You need to edit the display manager configuration script that starts X. In the default build with lightdm the file to edit is
/etc/lightdm/lightdm.conf
In the SeatDefaults section it gives the command for starting the X server which I modified to get it to turn off the screen saver as well as dpms
[SeatDefaults]

xserver-command=X -s 0 -dpms
Step 4 – Start a web browser automatically at start-up
Create a directory named autostart inside ~/.config. Here, the ~ means the home directory of the account that log-in directly to X. Then, in theautostart directory, create a *.desktop file and make it executable (chmod +x [your_file].desktop). The format of the *.desktop file as follows:
[Desktop Entry]

Type=Application

Exec=your_application_path_here (Either Step 4a or 4b)
Step 4a – Start Chromium automatically at start-up
Install Chromium
sudo apt-get install chromium
Use this path if you want to use Chromium (Alternative URL’s are listed at the bottom of the page).
chromium --incognito --kiosk http://www.tfl.gov.uk/tfl/syndication/feeds/esubs/portrait-27.html
Step 4b – Start Firefox (Iceweasel) automatically at start-up
Install Firefox (Iceweasel)
sudo apt-get install iceweasel** Note – I have not worked out the configuration for Firefox / Iceweasel yet **
Step 5 – Configure the Correct Screen Resolution for your portrait display
Information on all the available screen resolutions that are available can be found at http://elinux.org/RPi_config.txt#Video_mode_options
This has very in-depth documentation of the main Raspbian /boot/config.txt file. There are a lot of really useful options within this file, but for this step we are really only interested in the display settings.
Firstly I would recommend that you install the xrandr packages to get the “Screen Resolution” tool from X to work.
sudo apt-get install x11-xserver-utils
Next reboot your Raspberry Pi and see how the page looks. If it is not right then a bit of manual display configuration will be required.
To do this, edit /boot/config.txt with you favourite text editor and add the appropriate options for your display.
e.g. If my screen has a resolution of 1680 x 1050 @ 60Hz then I would add the following options to /boot/config.txt.
hdmi_group=2
hdmi_mode=58
Please be aware that you may have to make changes to the values already in the file.
Step 6 – Rotate the display to portrait instead of landscape
This TfL page was designed to be displayed on a portrait display, however it is a fairly simple to switch the screen orientation.
Edit /boot/config.txt with you favourite text editor and add the following line, if doesn’t already exist. Otherwise just edit the value as appropriate.
display_rotate=1
This will rotate the page 90 degrees. If this is not correct for your display you can adjust this as appropriate. I have included the other orientations for reference.
display_rotate=0 Normal

display_rotate=1 90 degrees

display_rotate=2 180 degrees

display_rotate=3 270 degrees
Further Information
Alternative URL’s
1200 x 1600 Portrait – http://www.tfl.gov.uk/tfl/syndication/feeds/esubs/portrait-23.html
1080 x 1920 Portrait – http://www.tfl.gov.uk/tfl/syndication/feeds/esubs/portrait-27.html
1600px Landscape – http://www.tfl.gov.uk/tfl/syndication/feeds/esubs/landscape-25.html
Other TfL Open Data URL’s
TfL’s Open Data Site – http://www.tfl.gov.uk/info-for/open-data-users/
TfL Open Data Feeds – https://api-portal.tfl.gov.uk/docs
TfL Line Status XML Feed – http://cloud.tfl.gov.uk/TrackerNet/LineStatus
** Please Note that some of the data provided by TfL requires you to register for an API key and is subject to TfL’s Terms and conditions.

2 comments